Palestinian Knafeh Recipe (KUNAFA)
In the world of desserts, few can claim the harmonious contrast of textures and flavors quite like Knafeh, a dish where simplicity meets complexity. My kitchen adventures have led me to a recipe that not only pays homage to traditional techniques but also invites a touch of modern flair. Master the art of Palestinian Kunafa with this authentic Knafeh recipe. A sweet, cheesy dessert that’s a staple in Middle Eastern cuisine, full of flavor!
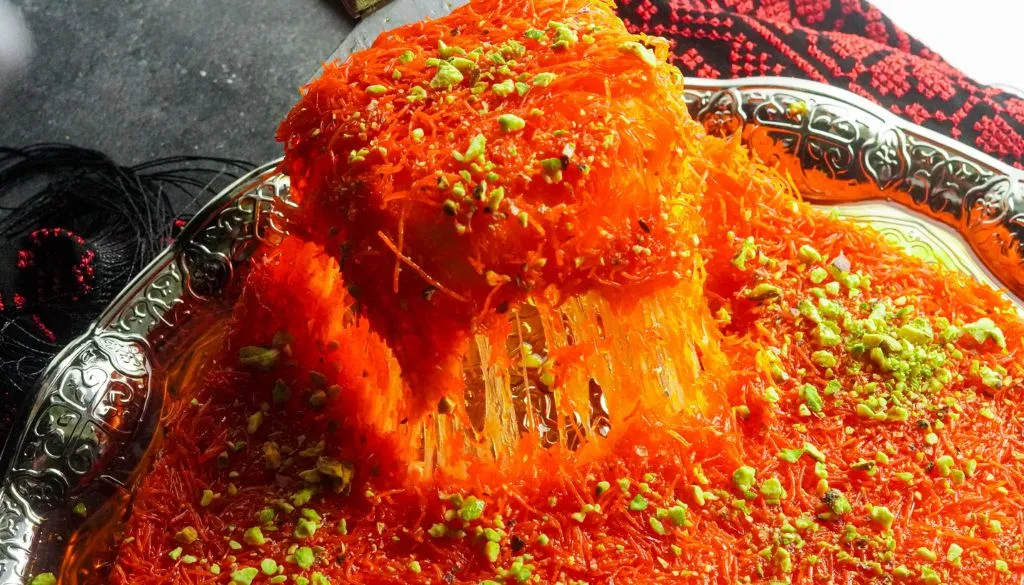
I’m eager to share my insights on achieving that impeccable balance between the crispy Kunafa layer and the lush, sweet filling. Join me in uncovering the secrets to crafting a Knafeh that promises to transport your senses straight to the heart of the Middle East.
Palestinian Knafeh recipe (Kunafa)
Delving into the heart of Palestinian culinary tradition, the Kunafa recipe from Nablus stands out as a testament to centuries-old craftsmanship, utilizing shredded phyllo pastry and sweet cheese to create a dessert that perfectly balances texture and sweetness.
This traditional dish, deeply rooted in the Levant region’s culture, symbolizes the rich heritage and exquisite flavors that define Palestinian cuisine.
The making of Knafeh is an art form in itself, beginning with the meticulous preparation of shredded phyllo dough, which is then intricately layered with sweet cheese, a hallmark of this beloved specialty. The process of baking transforms these simple ingredients into a golden, crispy crust enveloping a meltingly soft cheese core, a texture that’s both inviting and indulgent.
Unlike many sweet treats, Knafeh Naameh is traditionally cooked on the stovetop, a technique that lends this dessert its distinctive smooth yet slightly crunchy texture. It’s then generously drizzled with syrup, adding a final touch of sweetness that complements the savory notes of the cheese perfectly.
Exploring the nuances of Knafeh, from its origins in Nablus to its celebrated place in Levantine culture, reveals not just a recipe, but a story of tradition, community, and the enduring power of food to bring people together.
Ingredients Needed And Where To Find Them?
For crafting an authentic knafeh, it’s crucial to familiarize oneself with the essential ingredients and their sources. At the heart of this Middle Eastern delicacy lie key components such as kataifi dough, ghee, and an orangish-red knafeh food color that bestows the dish with its characteristic hue. T
he choice of sweet cheese, whether it’s traditional Nabulsi or Akkawi, or a more accessible substitute like Ricotta or Mozzarella, significantly influences the texture and flavor profile of the final dish.
Finding these ingredients might seem daunting, but they’re readily available in Middle Eastern and South Asian grocery stores. Kataifi dough, essential for the crunchy base, and sweet cheese, pivotal for the creamy filling, serve as the foundation of knafeh. Ghee, clarified butter, enriches the dough with a subtle, nutty aroma, enhancing the overall taste.


The unique knafeh food color is indispensable for achieving the authentic look, while rosewater adds a fragrant, floral note, elevating the sensory experience. Armed with these ingredients, I’m ready to delve into the art of knafeh making, combining tradition with personal culinary exploration.
How to Make KNAFEH
I’ll begin by preparing the cheese, ensuring it’s perfectly softened for that creamy layer in our Knafeh. Next, I’ll tackle the kataifi dough, teasing it apart with a mix of expertise and patience to create the ideal base and topping. These steps set the foundation for layering, baking, and ultimately soaking the dessert in syrup, crafting a dish that promises a symphony of textures and flavors.
Prepare The Cheese
Mastering the art of cheese preparation is a pivotal step in crafting the perfect knafeh, as it significantly influences the dessert’s flavor and texture. When I prepare the cheese, I start by soaking it in water to remove excess salt, a crucial step for achieving the right balance of sweetness.


After soaking, I drain and crumble the cheese, ensuring it’s ready for even layering within the dessert. Slicing it thinly further aids in its uniform distribution.
The choice of cheese is also paramount; Akkawi or Nabulsi cheeses are my go-tos for an authentic taste and texture. This meticulous preparation of the cheese not only imbues the knafeh with its characteristic creamy heart but also elevates the overall gastronomic experience, blending tradition with culinary finesse.
Prepare The Kataifi
Having prepared the cheese meticulously for our knafeh, we now turn our attention to the kataifi, a crucial element that lends this dessert its distinctive texture. The kataifi, with its fine, shredded nature, becomes the foundation of our culinary creation. By taking the kataifi dough and giving it a quick pulse in the food processor, we achieve a finer consistency, enhancing the texture and stability of our bottom crust.


This step is not just about aesthetics but about ensuring that every bite offers a perfect balance of crunchy and creamy. Pressing the kataifi firmly into the pan is essential, creating a stable base that will cradle the sweet cheese beautifully. This process, while seemingly simple, is pivotal in marrying taste and texture seamlessly, setting the stage for a truly delectable knafeh.
Layer The Knafeh
With the kataifi dough finely processed and the sweet cheese prepared, we now embark on the crucial step of layering our knafeh, ensuring each layer melds seamlessly to create a harmonious blend of textures and flavors. Starting with the shredded kataifi dough, I carefully spread an even layer at the base, pressing it down to form a compact and well-structured foundation.
Atop this, a generous layer of sweet cheese is added, ensuring it’s evenly spread for uniformity in taste and texture. This process of alternating layers continues, culminating in a final layering of kataifi dough to achieve a visually appealing presentation.
It’s pivotal that each layer is precisely pressed down, fostering an environment where the sweet cheese melts beautifully within, contrasted against the crispy and golden crust that will form upon baking.
Bake And Prepare The Syrup
To ensure a golden, crispy finish, I preheat my oven to 375°F (190°C) before diving into the baking process of the knafeh. After mixing the shredded phyllo dough with melted butter and a hint of food coloring to achieve that signature vibrant hue, I evenly spread the mixture in a baking pan, ensuring it’s compact and even for uniform baking.
As it bakes, I focus on the simple syrup—a crucial element. Boiling sugar, water, and a splash of lemon juice, I watch until the sugar dissolves completely.
The aroma is enticing, promising a sweet complement to the knafeh’s crunch. Once the knafeh reaches that desired golden brown perfection, I ready my serving tray, anticipating the layering of flavors with syrup and crushed pistachios.
Soak, Decorate And Serve!
Before assembling the final masterpiece, it’s crucial to first soak the sweet cheese in water to effectively remove any excess salt, ensuring the perfect balance of flavors in our knafeh creation. This step is non-negotiable for achieving that harmonious blend between the creamy cheese and the crispy pastry.
Once the knafeh is baked to golden perfection, I meticulously decorate it with crushed pistachios, adding a vibrant touch of green that not only pleases the eye but also introduces a delightful crunch.
Before serving, I ensure the syrup is cool; pouring it over the warm pastry infuses it with sweetness without making it soggy. To serve, I cut the knafeh while it’s still warm, capturing the essence of its gooey, cheesy core. If there are leftovers, I refrigerate them, though it’s best savored fresh.
What Pan To Bake Knafeh IN?
Selecting the right pan to bake knafeh is a critical step that can significantly impact the dessert’s texture and flavor. When I bake knafeh, I always consider the pan size and depth carefully. A 9×13 rectangular pan or similar cake pans are my go-to for achieving that perfect balance. The depth is particularly important; it must be sufficient to layer the kunafa dough, cheese, and ensure there’s enough room for the syrup to soak through without causing an overflow.
For those who prefer individual servings, I’ve found that using a muffin tray can create delightful mini knafehs. This method not only offers easier handling and portion control but also adds a unique touch to the presentation. It’s an excellent way to experiment with the dessert, allowing you to adjust the texture and flavor profile to your liking.
The essence of baking knafeh, regardless of the pan choice, is to achieve a harmonious blend of crunchy pastry, melting cheese, and the sweet syrup. Through experimentation with different pan sizes and depths, I’ve learned that the final texture and presentation of the knafeh can vary, making each baking adventure a unique experience.
Storing and reheating leftover Knafeh
Often, the joy of indulging in knafeh extends beyond the initial serving, requiring effective methods for storing and reheating leftovers to preserve its delightful taste and texture. Storing knafeh properly is crucial to maintaining its quality. I’ve found that placing the leftovers in an airtight container ensures the cheese remains moist and the syrup doesn’t crystallize, keeping the knafeh as fresh as possible.
This method allows it to stay in the refrigerator for up to three days without sacrificing flavor.
When it comes to reheating, the oven truly is your best friend. By reheating knafeh at 350°F for about 10-15 minutes, you can almost perfectly recapture its original crispiness and warmth, making it seem freshly made. The texture, especially, benefits from oven reheating, as it avoids the sogginess that microwaving tends to induce. Before popping it into the oven, I lightly sprinkle water over the knafeh to prevent drying out, ensuring the cheese softens beautifully beneath its crunchy top layer.
After reheating, a fresh drizzle of syrup and a sprinkle of chopped pistachios not only enhance the flavors but also add a delightful contrast to the dish, making the reheated knafeh a luxurious treat all over again.
Frequently Asked Questions
What’s Knafeh Made Of?
I’ve learned that Knafeh is crafted from shredded phyllo dough, often paired with sweet cheese like Nabulsi or Akkawi. It’s enriched with ghee for flavor, then baked and soaked in syrup for its signature sweetness.
What Is Kunafa Dough Made Of?
I’ve learned that kunafa dough is crafted from wheat flour, water, cornstarch, oil, and salt. The cornstarch gives it elasticity, ensuring it bakes into a crispy, crunchy texture that’s perfect for various desserts.
Is Knafeh Same as Kunafa?
Yes, Knafeh and Kunafa refer to the same dessert. They’re variations in spelling based on regional dialects but describe the same Middle Eastern pastry dish, featuring shredded pastry, sweet cheese, and syrup. It’s a beloved treat.
What Is Classic Kunafa Made Of?
I’ve learned classic Kunafa is crafted from shredded phyllo dough, known as kataifi. It’s paired with sweet cheese, like Nabulsi, and drenched in ghee. A rosewater-flavored syrup adds sweetness, making it utterly irresistible.
Conclusion
Having embarked on this delightful culinary journey, I’ve found crafting Knafeh at home to be not just a process, but an art form. The harmonious blend of crunchy shredded pastry and creamy filling, all soaked in sweet syrup, is a testament to the rich heritage of Middle Eastern cuisine. Whether opting for a traditional ashta or indulging in a sweet cheese center, the versatility of Knafeh caters to all palates.
Perfectly baked in the right pan and carefully stored, each serving is a warm embrace from a culture that celebrates flavor and texture with every bite. This journey hasn’t just satisfied my taste buds; it’s deepened my appreciation for the culinary traditions that make Knafeh so special.

Palestinian Knafeh Recipe (KUNAFA)
Equipment
- Baking pan
- Large bowl
- Cheese grater (optional)
- Saucepan
- Pastry brush
Ingredients
- For the Dough:
- 1 pound kataifi dough shredded phyllo dough
- ¾ cups ghee or clarified butter melted
- 1 tsp knafeh pastry coloring orange
- For the Filling:
- 1 pound Nabulsi cheese or a mix of mozzarella and ricotta cheese
- 1 ½ cups sugar
- 1 ½ cups water
- Rosewater extract optional
- For Garnish:
- Chopped pistachios
Instructions
- Prepare the Cheeses:
- If using Nabulsi cheese, crumble it with your hands. Otherwise, grate mozzarella and ricotta cheese using a cheese grater or pulse them a few times in a food processor.
- Make the Sugar Syrup:
- Combine sugar and water in a saucepan over medium heat. Bring to a boil, stirring occasionally, until sugar dissolves. Reduce heat and simmer for 5 minutes.
- You can add a splash of rosewater extract for a floral aroma (optional). Set aside to cool slightly.
- Assemble the Knafeh:
- Preheat oven to 450°F (230°C). Grease your baking pan with butter.
- In a large bowl, shred the kataifi dough with your hands or using scissors into 1-3 inch strands.
- Combine melted ghee/butter with knafeh food coloring and toss it with the shredded dough until evenly coated.
- Layer and Bake:
- Divide the shredded dough roughly into thirds. Spread the first third evenly into the bottom of the baking pan, pressing down firmly to create a compact layer that goes slightly up the edges.
- Fill the center with the crumbled cheese.
- Top with the remaining shredded dough and press down again to ensure everything is packed tightly.
- Bake until Golden Brown:
- Bake the knafeh for 20-25 minutes, or until the top is golden brown and crispy.
- Soak in Syrup and Garnish:
- Take the knafeh out of the oven and immediately pour the cooled (but not cold) sugar syrup over it, allowing it to soak in.
- Let it rest for 10-15 minutes before serving warm. Garnish with chopped pistachios.
Notes
If kataifi dough is unavailable, you can use shredded phyllo dough, but the texture won’t be exactly the same.
Nabulsi cheese is ideal for its brined taste and stretchy texture. If unavailable, a mixture of mozzarella and ricotta cheese can work as a substitute.
Adjust the amount of sugar syrup depending on your preference for sweetness.
Knafeh is best enjoyed warm, but leftovers can be stored in the refrigerator for up to 2 days. Reheat in the oven before serving.

